Edible installation safety checklist: comply with health codes, win venue trust
Transforming food into art thrills audiences, yet one hygiene slip can shut down the show. Follow this edible installation safety checklist to align with health codes, reassure venues and protect your creative reputation.
The stakes: why venues demand flawless food safety
Venues approve edible experiences only when convinced that every bite is safe. A single incident can attract legal claims, negative press and long-term brand damage. A robust edible installation safety checklist is therefore your best sales asset. Venue managers, often guided by strict insurance clauses and municipal regulations, inspect documented hazard analyses, allergen matrices and contingency plans for power failure or staff illness before they even glance at your creative renders; passing that test positions you as a low-risk visionary.
Key risks to control
- Bacterial growth from time–temperature abuse.
- Cross-contact of allergens and non-allergens.
- Foreign objects introduced during transport or build.
- Inadequate cleaning of decorative props that touch food.
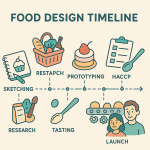
Phase 1 – Pre-production safety checklist
Plan safety as early as you sketch the concept. Share your hygiene strategy in proposals and mood-boards so venues see a proactive partner, not a liability.
| Item | Best practice | Who signs off |
|---|---|---|
| Ingredient sourcing certificates | Request HACCP documents from suppliers | Procurement lead |
| Allergen mapping | List EU 14 or FDA 8 allergens in a master sheet | Food safety officer |
| Site visit | Inspect power, water, waste routes, pest control records | Project manager + venue rep |
| Transport plan | Refrigerated vans ≤ 4 °C; log temperatures every 30 min | Logistics lead |
| Insurance | Product & public liability covering food-borne illness | Legal / finance |
Need cost benchmarks for the above tasks? Our dynamic pricing guide for food-install projects breaks down typical budgets.
Phase 2 – Build-day hygiene protocol
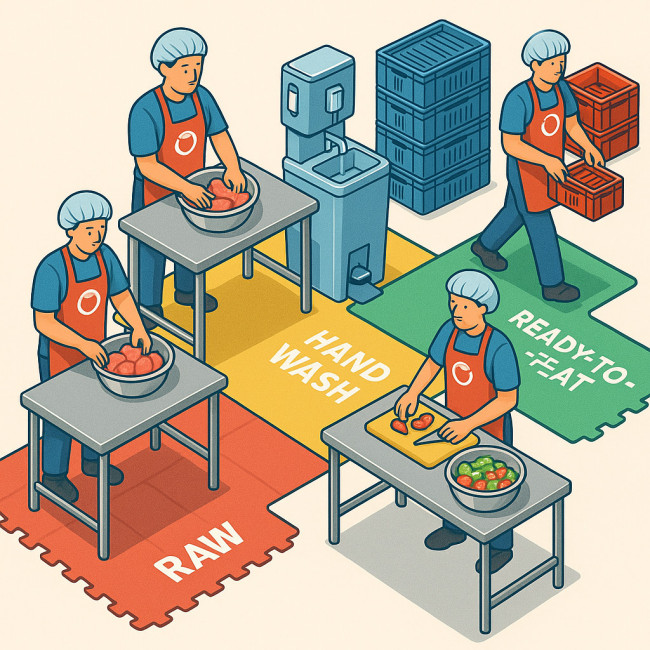
Before the first crate is wheeled inside, map out the physical choreography of your build. Mark entry points, power cords and waste streams on a scaled floor plan, and assign a supervisor to enforce one-way movement that limits cross-traffic between clean and dirty zones. Colour-coded mats signal staff where gloves must be changed, while a 15-minute sanitation timer alerts crew over walkie-talkies. This pre-emptive micro-logistics easily clears venue audits and keeps your artistry on schedule.
Set up a food-safe zone
- Lay colour-coded, sanitised mats under prep surfaces.
- Install portable hand-washing stations within 5 m of any food contact point.
- Separate raw and ready-to-eat ingredients by at least 60 cm and use distinct utensils.
Time–temperature controls
The danger zone (5 – 57 °C) accelerates bacterial growth. Follow the “2-hour/4-hour rule”:
- Discard any food kept between 5 – 57 °C for over 4 hours.
- If exposure is 2-4 hours, serve immediately—no re-chill.
- Under 2 hours? Rapid-chill back below 5 °C.
Allergen command centre
Print a large allergen map and place it at the entry of the installation zone. Colour-code serving utensils to match allergen-free batches. QR codes linking to full ingredient lists provide transparency and comply with Natasha's Law and FDA menu labeling rules.
Phase 3 – Service safety checklist
Train your ushers
Anyone handing a taste to guests must know how to:
- Explain allergens and portion limits confidently.
- Use tongs or gloves—never bare hands.
- Log hold temperatures every 30 minutes.
Guest flow management
Design one-way traffic to avoid guests leaning over exposed food. Low-height displays delight the camera but invite cough droplets; add transparent sneeze guards aligned to camera angles to preserve aesthetics.
For additional brand alignment ideas, read our guide on briefing culinary artists for product launches.
Phase 4 – Breakdown & post-event protocol
- Log final waste weight and disposal method to prove sustainability compliance.
- Sanitise reusable props with food-grade detergents before packing.
- Store temperature logs and cleaning records for at least 90 days (often required by local health authorities).
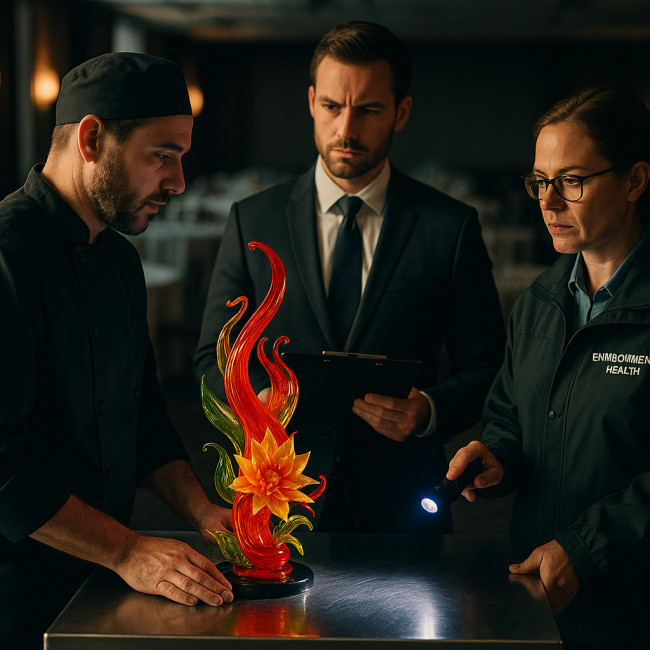
Common venue objections and persuasive answers
“We're worried about cross-contamination with our in-house kitchen.”
Offer a sealed prep tent, distinct waste bins and dedicated staff attire. Show your edible installation safety checklist and invite venue chefs to co-sign it.
“Insurance won't cover food served outside the kitchen.”
Present proof of product liability and include the venue as an additional insured party. Reference your food-safe craft designer profile to highlight verified credentials.
“We can't risk allergen incidents.”
Demonstrate your allergen map, coloured utensils and staff script for guest enquiries. Provide sample signage files ready for the venue's approval.
Looking to attract eco-focused venues? Pair this checklist with the sustainable sourcing roadmap for culinary art events to double your trust score.
Checklist quick reference
- Plan – ingredient certificates, HACCP flow, transport cooling.
- Build – colour-coded zones, hand-wash stations, tool sterilisation.
- Serve – time–temperature logs, allergen signage, trained ushers.
- Close – waste audit, prop sanitation, record archiving.
Short quiz: test your edible installation safety IQ
FAQ
- Do I need a certified food-safety manager on site?
- Most regions require at least one person with a valid food-protection certificate during service. Check local authority rules.
- Can edible paints and glitters be used?
- Only products labelled “food-grade” and approved by FDA or EFSA are permitted. Craft glitter is never acceptable.
- How far in advance should I prepare perishable components?
- Prepare within 24 hours, keep ≤ 4 °C and transport in chilled containers to minimise bacterial growth.
- What documentation should I submit to the venue?
- HACCP summary, ingredient list with allergens, insurance certificate, staff training records and your edible installation safety checklist.
Next steps
Merge this checklist with airtight licensing clauses by reviewing our article on licensing edible art for media shoots. Together they form a proposal package that venues approve quickly.
Ready to pitch? Adapt the steps above, showcase your compliance history and watch venues greet your edible creations with confidence.