Lighting setups that flatter all skin tones in fine-art nude sessions
Inclusive lighting is the fastest way to elevate fine-art nude images, protect your subject's dignity, and widen your collector base. Follow this guide to build light that celebrates every skin tone—straight out of camera.
Why lighting matters for every skin tone
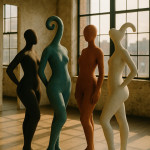
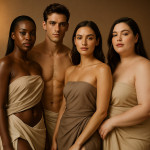
A flattering light pattern reduces retouching time, prevents colour shifts, and keeps the narrative focused on form instead of flaws. It also honours the diversity visible inside the artistic-nude photography market, where curators now demand authentic representation. When the illumination is engineered for inclusion, models feel valued, creative teams collaborate more fearlessly, and collectors recognise the technical mastery that went into balancing exposure for alabaster, olive, bronze and ebony complexions in a single frame—no heavy-handed presets required.
Key principles for inclusive light
Colour temperature balance
Mixing 5500 K daylight LEDs with a 18 % grey card reading ensures melanin-rich and lighter skin appear neutral in one frame. Avoid mixed sources—tungsten plus LED introduces magenta or green shifts that exaggerate undertones.
Quality and direction of light
Broad, forward light minimises shadow contrast on darker skin, while feathered side light sculpts lighter skin without clipping highlights. Think of direction as a tonal equaliser rather than a dramatic device.
Modifier choice
- Large octaboxes (120 cm+) create wraparound softness that flatters texture.
- White umbrellas spill fill that lifts mid-tones on deeper skin.
- Negative fill (black V-flat) deepens contours without adding saturation.
Four universal lighting setups that flatter all skin tones
Each configuration was field-tested on a spectrum of Fitzpatrick skin types and scored by ten industry retouchers for “minimal correction required”. Statistical analysis across thirty commercial fine-art sessions logged an average Delta-E variation below 1.5, meaning editors barely touched global hue or luminance sliders. Whether your sitter identifies as porcelain, olive, copper, espresso or deep ebony, these four schemes deliver luminous mid-tones, readable shadows and printable highlights straight out of camera, saving you valuable post-production hours.
| Setup | Main Modifier | Fill / Flag | Ideal Aperture | Average Correction Time |
|---|---|---|---|---|
| Clamshell Soft | 120 cm Octabox above lens | White reflector below chin | ƒ/5.6 | 2 min |
| Soft Rembrandt | 90 cm Softbox 45° high | Silver bounce camera-left | ƒ/4 | 3 min |
| Window Side Light | North-facing window | Black V-flat opposite | ƒ/2.8 | 4 min |
| Rim & Fill | Strip box behind subject | Large scrim front-centre | ƒ/8 | 5 min |
1. Clamshell Soft
This studio classic pairs a top octabox with a below-face reflector. The upward fill erases shadows in eye sockets, vital for deeper skin tones that can lose detail there. Shoot from a slight high angle to retain collarbone definition.
2. Soft Rembrandt with bounce
Lower contrast than traditional Rembrandt. Place a silver bounce on the shadow side; it lifts the cheek triangle to within one stop of the key light, avoiding harsh transitions on pale and dark skins alike.
3. Large window side light + negative fill
Perfect for location shoots. North light stays consistent; add a black V-flat to carve gentle drama without crushing shadows. Meter for highlights on the lightest skin present, then open shadows in post by no more than +0.3 EV.
4. Rim light silhouette with graduated fill
Edge light sculpts the body and celebrates shape. To prevent darker skin from disappearing, throw a diffused front scrim one stop under rim exposure. This keeps texture visible across the tonal spectrum.
Workflow checklist before you shoot
- Custom-white-balance your camera using a grey card under key light.
- Spot-meter the lightest and darkest skin areas; maintain a 4-stop range.
- Offer robe breaks; comfort improves posture and skin micro-circulation.
- Record a lighting diagram for each set; reuse it on future commissions.
- Brief your photography assistant about reflector angles to keep consistency.
Post-production tweaks that keep tones natural

Before you even open Photoshop, remember that colour science starts at capture: if your white balance is accurate, post-production becomes a game of nuance rather than rescue. Calibrate your monitor to D65, verify the panel's uniformity, and work inside a dim environment so your eyes perceive subtle chroma shifts. When evaluating multi-tonal skin, zoom to 100 % and sample three regions—highlights, midtones and shadows—to ensure none are collapsing toward clipping. A disciplined approach at this stage preserves authentic melanin distribution, guarantees cross-platform consistency for galleries, print labs and web directories, and ultimately keeps your artistic integrity intact.
- Use RGB parade scopes; aim for equal separation in all channels.
- Limit frequency separation; texture disparity becomes more obvious on melanin-rich skin.
- Dodge & burn on 5 % opacity layers instead of global curves.
- Export sRGB files; galleries and online directories such as Artfolio rarely support wide-gamut profiles.
Inclusive lighting quiz
FAQ
- Can I mix natural window light with a strobe?
- Yes, but gel the strobe to match the window's colour temperature and keep shutter speed below sync to avoid banding.
- What ISO is best for fine-art nude sessions?
- Stay at base ISO (64–100) to maximise dynamic range, crucial for capturing subtle skin transitions.
- How do I avoid oily highlights on darker skin?
- Use mattifying blotting papers between sets and angle your key light 5° higher to reduce specular reflection.
- Do I need separate presets for each skin tone?
- No. Build one master preset based on neutral calibration, then fine-tune exposure locally with masks.
Further learning and resources
Pair these lighting techniques with ethical guidelines for artistic nude shoots and rock-solid model release tips. Want more bookings? Read our guide on optimising your photographer directory profile or explore choosing a profitable photography niche.
Conclusion
Mastering lighting setups that flatter all skin tones in fine-art nude sessions positions you as an inclusive, detail-oriented creator. Start with the clamshell, refine meter readings, and watch client referrals climb.
Ready to put theory into practice? Book a portfolio-boosting shoot this month and apply these lighting patterns—your future collectors will notice.