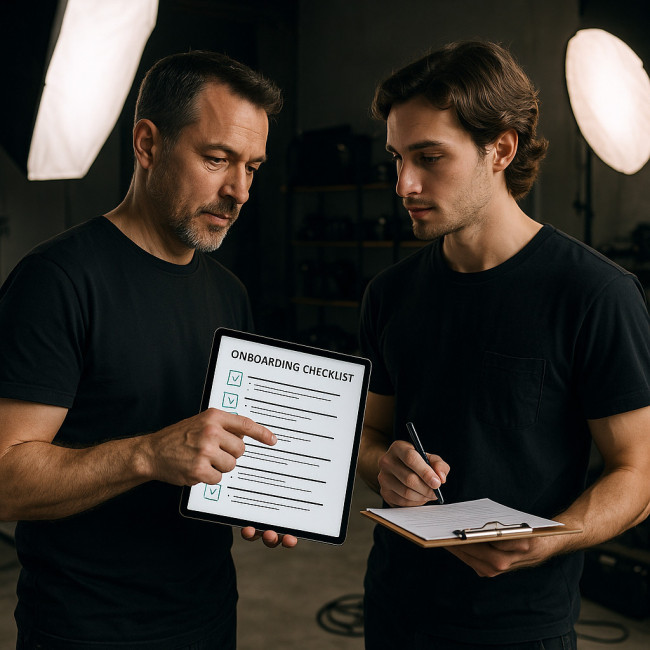
Onboarding new assistants: checklists that keep studio days stress-free
A well-structured onboarding process turns a nervous first-day assistant into a confident crew member who anticipates your needs, safeguards your gear and delivers value that clients notice. Follow the step-by-step checklist below, add the downloadable templates, and watch your studio days flow with less stress and more creative focus.
Why you need a bullet-proof assistant onboarding plan
Assistants form the glue between the lead photographer, talent, stylists and clients. When onboarding is ad-hoc, small oversights snowball into missed shots, damaged props or overtime fees. Conversely, using a repeatable checklist raises consistency, cuts briefing time and nurtures talent who grow with your studio rather than churn after a single job.
- Higher production value: assistants who know lighting names, cable routes and backup rituals protect your images and reputation.
- Fewer delays: clear expectations curb “Where do I find…?” questions that slow the set.
- Talent pipeline: structured onboarding signals professionalism and attracts ambitious creatives looking for fair progression, echoing the assistant role definitions most recruiters benchmark against.
The ultimate studio assistant onboarding checklist
1. One week before the shoot
- Send the shoot brief & mood board – include lighting diagrams, reference images and timing. Encourage questions within 24 h.
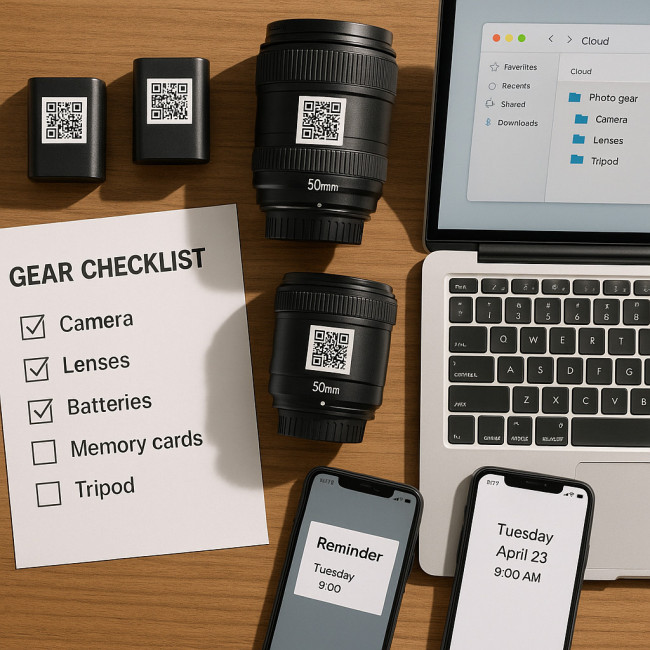
- Share the gear list – add serial numbers and storage locations. Link to your gear redundancy strategies guide so assistants grasp backup expectations.
- Outline wardrobe and set etiquette – explain no-fragrance rules, client confidentiality and social-media embargoes.
- Provide a site-safety primer – floor plans, emergency exits and insurance certificates. Reinforce procedures from live-shoot risk management protocols.
- Collect assistant details – phone, dietary needs, invoicing info, transport method.
2. Two days before the shoot
- Run a 20-minute video call – walk through the schedule, assign kit, confirm arrival time.
- Share prep tutorials – micro-lessons on flag folding, sandbag safety and tether-station setup. A link to pre-production questionnaires encourages proactive clarification.
- Issue a packing checklist – include personal essentials: weather-proof clothing, snacks, power bank, black gaffer tape.
3. Arrival day
- Welcome & tour (10 min): restrooms, client lounge, charging station.
- Health & safety sign-off (5 min): confirm fire exits, PPE and heavy-lifting limits.
- Gear handshake (15 min): together, check lenses, clean sensors, test cables.
- Role allocation: assign “battery marshal”, “reflector captain” or “data runner” roles so responsibilities stay crystal clear.
- Introduce to the team: names and pronouns of stylists, HMU, art director.
4. During the shoot
| Task | Time stamp | Success marker |
|---|---|---|
| Light checks & meter readings | 30 min before first frame | Consistent f-stop within ±0.2 |
| Media card management | Every set change | Dual backup confirmed |
| Client comfort | Hourly | Water/coffee offered |
| Data transfer to RAID | Lunch break | Checksum verified |
| End-of-day gear audit | Wrap-down | Zero missing items |
5. Post-shoot wrap-up
- Debrief while copying final files – what flowed, what blocked, ideas to refine.
- Return rented gear form – list condition notes and mileage.
- Capture assistant feedback – a quick Google Form keeps pointers fresh.
- Confirm invoice submission window – fairness keeps motivation high.
Tools and templates that turbo-charge onboarding
Checklists shine when paired with lightweight tech. Below are plug-and-play options studios adopt:
- Cloud folders: a simple “Read-Me-First” drives orientation.
- QR code gear labels: scan to open setup videos – assistants can refresh knowledge without interrupting you.
- Automation rules: Calendly sends date-specific reminders and embeds checklists into calendar invites.
- Collaborative boards: real-time kanban cards let multiple assistants log task completion and see live priorities.
Mentoring assistants for long-term studio success
Great onboarding is phase one. Continuous mentorship builds loyalty and elevates your brand. Rotate assistants through lighting, digital-tech and client-liaison roles over multiple shoots. Offer micro-learning credits for safety or colour-science courses. Publicly credit their work on social posts and in portfolio case studies. Such visibility mirrors the collaboration spirit promoted on collaboration-ready photographer pages that agencies browse daily.
Mini-quiz: Are your onboarding habits studio-ready?
FAQ
- How far ahead should I book an assistant for a commercial shoot?
- Two to four weeks is ideal. This window gives you enough time to vet skills, send the checklist and build rapport, yet remains flexible for client date changes.
- Do I need separate onboarding for freelance and intern assistants?
- The core checklist stays the same for safety and workflow. Add contractual extras—NDAs, credit policy and pay scales—based on employment status.
- What's the best way to train assistants on new gear?
- Create 60-second screen or phone video demos, host them in a labelled cloud folder, and link each QR code on the physical kit. Assistants can self-train without interrupting the shoot.
- How do I evaluate whether an assistant is ready for more responsibility?
- Track punctuality, task accuracy and initiative across three shoots. When they consistently flag issues before they occur, graduate them to second-shooter roles.
- Should assistants sign a safety agreement?
- Yes. A one-page acknowledgment of lifting limits, electrical handling and emergency protocol protects both parties and aligns with insurance requirements.
Key takeaways
- Onboarding is not a one-off email—it's a multi-step framework.
- Visual checklists, QR-labelled gear, and regular feedback loops slash errors and boost morale.
- Mentored assistants evolve into trusted collaborators who raise your studio's creative ceiling.
Ready to level up? Download the checklist template, implement it on your next booking, and share your results. Your future self—and your clients—will thank you.