From swatch to screen: shooting fabrics so recruiters sense texture online
Want fashion recruiters to picture your garments in their hands? Master fabric photography that conveys drape, weave and hand-feel through any screen. Follow this step-by-step guide—from studio prep to export settings—to make every pixel shout “touch me”.
Why texture fidelity decides who gets shortlisted
In directory listings, buyers can't stroke your samples. Your photos must therefore carry the tactile story. According to the online hiring platform Artfolio, garment profiles that show clear texture detail earn 37 % more click-through to contact forms than flat product shots. That can be the difference between being scrolled past and being booked.
- Drape and depth help sourcing managers judge how fabric will behave in motion.
- Surface sheen guides cost estimations for lining, care and finishing.
- Weave clarity signals quality and eco-credentials—vital for sustainable briefs.
Essential gear checklist for fabric shoots
- DSLR or mirrorless body with a 50 mm prime (minimal distortion) and a macro lens for close-ups.
- Tripod with horizontal arm—or c-stand—for overhead flat lays.
- Continuous LED panel (95+ CRI) plus softbox; add a grid for specular highlights.
- Polarising filter to tame unwanted glare on satin and coated textiles.
- Grey card and colour checker for white balance consistency.
- Large foam boards for bounce fill and shadow control.
Lighting setups that reveal weave and pile
45° side light for universal texture
Place your key light at a 45-degree angle relative to the fabric. This rakes light across the surface, exaggerating ridges in twill or corduroy without blowing out highlights.
Back-lighting translucent fabrics
Silks, organza and mesh benefit from a rear light that shines through fibres. Pin the sample to an acrylic sheet, raise exposure by +2/3 stop, and capture both transparency and surface detail in one frame.
Cross-polarisation for shiny synthetics
Fit a linear polariser on the light source and a circular polariser on your lens, then rotate until reflections disappear. You'll keep colour accuracy on vinyl, lurex or waterproof membranes.
Styling and preparation: from wrinkle-free to storytelling
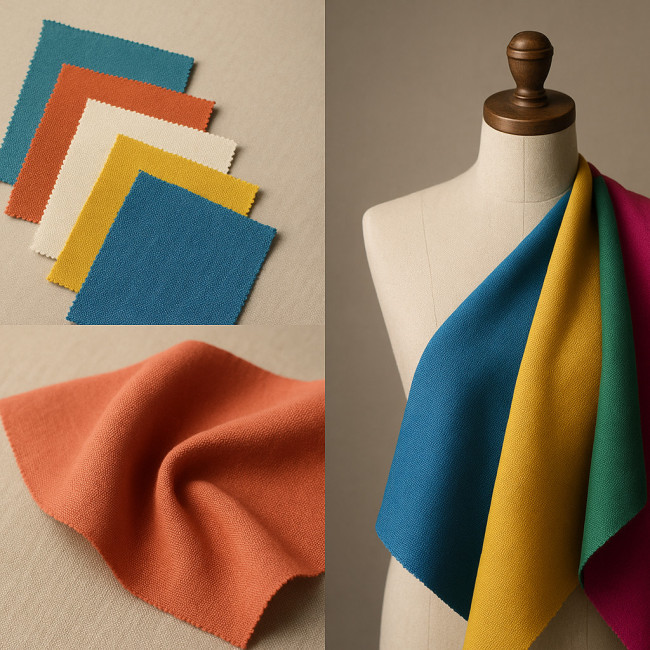
Iron or steam every swatch, then freeze shape with fabric tape or quilting pins outside the frame. Consider three hero angles per material:
- Flat lay – emphasises pattern repeat and grain.
- Gentle fold – shows bounce and opacity.
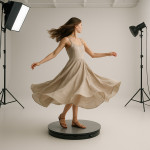
- Drape on form – communicates flow and thickness.
Need inspiration for dynamic mock-ups? See how creative teams use 3D cloth simulations in this guide to 3D textile mock-ups.
Camera settings that lock in micro-detail
- Aperture: f/8–f/11 balances depth of field and sharpness.
- ISO: keep under 200 to avoid noise that smears fibres.
- Shutter speed: let your tripod do the work—long exposures are fine.
- Manual focus: switch to live-view magnification for threads.
- Focus stacking: shoot a five-frame stack on bulky knits; blend in free software like Helicon Lite.
- File format: RAW for editing latitude.
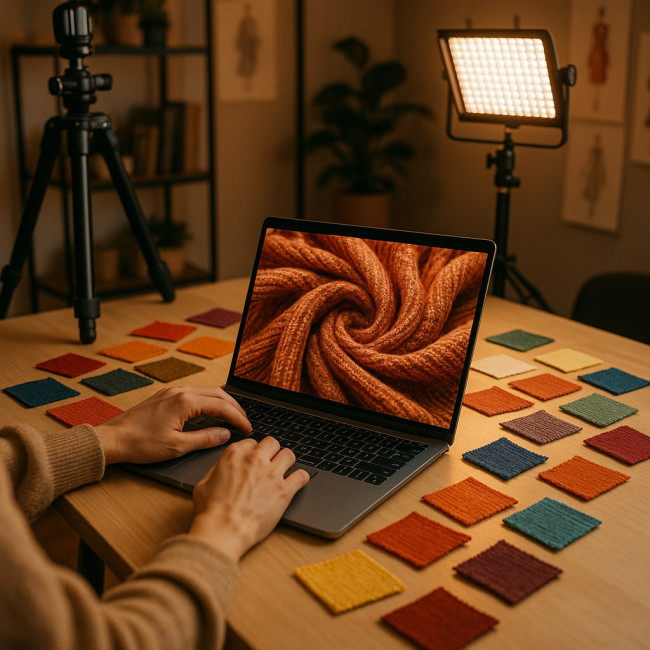
Post-production workflow for true-to-swatch colours
Open your RAW files in Lightroom or Capture One.
- Apply the grey-card shot as custom white balance.
- Set profile to “Adobe Neutral” (or equivalent) to avoid artificial punch.
- Boost Texture slider +15 and Clarity +5; higher values flatten micro-contrast.
- Enable lens profile corrections to remove vignetting that can darken edges of samples.
- Export TIFF master and sRGB JPG versions at 2 000 px on the longest side, 80 % quality.
- Add descriptive filenames:
wool-twill-indigo-closeup.jpg.
Quick comparison: DSLR vs smartphone
| Criteria | DSLR/Mirrorless | Recent Smartphone |
|---|---|---|
| Sensor Size | APS-C/Full Frame → better low-light detail | 1/1.3'' typical → noise in shadows |
| Lens Options | Interchangeable primes & macro | Fixed wide / digital zoom |
| Depth of Field Control | Precise aperture settings | Computational blur may misread edges |
| Colour Profiling | RAW 14-bit | 10-bit HEIF—limited edit headroom |
| Workflow Speed | Slower capture, pro quality | Fast capture, social previews |
Smartphones can still shine for behind-the-scenes reels and social teasers. Just remember to lock white balance and use a clip-on polariser.
Optimising uploads for recruiter platforms
Directories such as new clothing designer portfolios on Artfolio reward pages that load in under two seconds. Compress your JPGs with TinyPNG, then run a Core Web Vitals test. For further loading tricks, explore this image speed optimisation article.
- Add
alt="Macro photo showing the ribbed texture of olive-green cotton knit"style descriptors. - Embed colour profiles to prevent washed-out previews.
- Insert thumbnails in a grid that opens to 100 % crops—recruiters can zoom into weave without leaving the page.
Common pitfalls and how to dodge them
- Mixed colour temperatures: window light + LED introduces blue/orange casts. Block daylight or match bulb Kelvin values.
- Over-ironing synthetics: shiny press marks exaggerate in raked light—use a pressing cloth.
- Excess contrast in edit: kills subtle boucle or cashmere fuzz.
- Skipping scale cues: shoot a ruler or coin beside macro shots for context.
- Forgetting metadata: files named “IMG_1234” can't compete in search filters that read ALT tags.
Case study: converting swatches into bookings
Couturier L. Renard revamped her directory gallery with layered shots—flat, fold, drape—and saw message enquiries jump 42 % in eight weeks. She combined the techniques above with photorealistic composites explained in this mock-up tutorial. Recruiters cited “clear sense of weight and structure” as their top reason for reaching out.
Interactive quiz: test your fabric-shoot IQ
FAQ
- Can I achieve pro results with budget lighting?
- Yes. A $70 LED panel paired with a DIY diffusion sheet and reflector can outshine mixed household bulbs. Maintain consistent colour temperature and place lights strategically.
- How many texture shots per fabric should I upload?
- Three is optimal: flat pattern, macro weave, and draped form. More may overwhelm the gallery, fewer leaves recruiters guessing.
- Do I need a macro lens for every fabric?
- A 100 mm macro excels on fine weaves and lace. For chunky knits, a 50 mm prime close-up rings deliver enough detail.
- Is smartphone focus stacking possible?
- Some apps simulate stacking by burst capture and AI blend, but resolution often drops. For mission-critical samples, stick to a dedicated camera.
- What export size balances quality and load speed?
- Between 1 500 px and 2 000 px on the longest side at 70-80 % JPG quality keeps files under 400 KB while retaining thread definition.
Ready to let your textures speak?
Perfect a small batch of textile images using the workflow above, upload to your directory profile tonight, and monitor click-through rates this week. If you need advanced lighting or 3D mock-ups, our article on crafting recruiter-friendly visuals offers extra tips. Elevate your photographs and watch interview requests flow.
Call to action: Shoot, upload, and update your Artfolio gallery now—your next fashion contract is only a texture away.