Low-light event venues: pro tips to keep footage clean and dynamic
Concert halls, gala dinners and corporate receptions rarely offer the perfectly lit stage our cameras crave. Yet clients still expect crisp, cinematic footage. This guide explains how to prepare, shoot and grade in dim venues so your final video stays noise-free, colourful and punchy—without turning the room into a film set.
Why mastering low-light makes you bookable
Events only happen once. If your camera struggles, there is no re-take. Showing confident low-light work instantly separates you from videographers who panic when houselights drop. It also positions you for higher-budget hybrid broadcasts, where dynamic range and colour fidelity decide streaming quality.
Pre-production game plan
Scout the venue's existing light sources
- Request a tech sheet or, better, a quick walk-through at the same time of day the event starts.
- Measure ambience with a light meter or a camera's false-colour preview to spot under-exposed pockets.
- Note the colour temperature of spotlights, DJ rigs and decorative LEDs; mixed colour spikes complicate grading later.
Align expectations with the lighting designer
One five-minute call can save hours in post. Ask if they can bump key lights a stop during speeches or keep practical bulbs dimmed evenly. When you arrive prepared, you build trust—vital for winning future hybrid event workflow gigs.
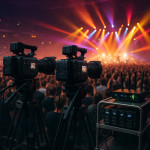
Gear choices that maximise your signal
Full-frame, dual-native ISO sensors
Cameras such as the Sony FX3 or Panasonic S5 II keep noise patterns tight at ISO 12 800 thanks to dual gain circuitry. If you own Super-35 bodies, rent full-frame for the night—your grade will thank you.
Fast glass is non-negotiable
| Focal length | Common max aperture | Low-light target |
|---|---|---|
| 24 mm | f/2.8 | f/1.4 |
| 35 mm | f/2 | f/1.2 |
| 50 mm | f/1.8 | f/1.4 |
| 85 mm | f/1.8 | f/1.4 |
Prime lenses one stop faster than the zooms in your kit effectively halve ISO requirements. Build your bag around the angles that matter—usually 35 mm for establishing shots and 85 mm for candid portraits.
Discreet light boosts
- Pocket-sized RGB LED panels with diffusion, mounted on lightweight stands, add a kiss of fill without blinding guests.
- Bounce a 60 W COB light into a white wall for a larger, softer source that blends into ambient design.
- Hidden practicals—battery candles on centre-pieces—raise luminance by ⅓ stop and feel native to décor.
Whenever possible, choose fixtures that run on NP-F batteries so you stay cable-free and compliant with venue safety rules.
In-camera settings that beat the noise monster
Expose to preserve highlights
A quick histogram rule: let highlights touch 90 % but never clip. Slight underexposure washes mid-tones with chroma noise that no denoiser fixes cleanly.
Custom picture profiles
- Use a wide-gamma Log profile (S-Log 3, V-Log) only if you can expose one stop higher than base ISO.
- Otherwise select a baked-in profile with lower base ISO (Cine2, HLG 1) to keep shadows intact.
Sharpness off, 10-bit on
In-camera sharpening accentuates noise. Disable it and rely on 10-bit 4:2:2 recording for latitude in post.
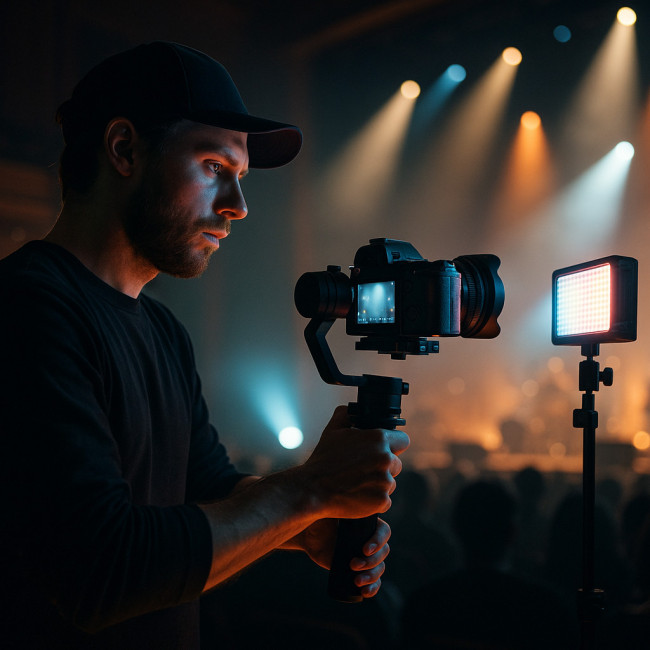
Run-and-gun stabilisation tricks
Blur exaggerates low-light grain. Combine optical IBIS with a lightweight gimbal or monopod. If the schedule is frantic, follow the “one-hand-one-lens” rule: lock a 35 mm prime on a compact gimbal so you can switch ISO or WB quickly without rebalancing.
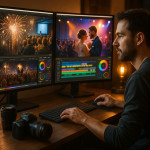
Post-production: denoise without plastic skin
Build a two-pass pipeline
- Temporal denoise first (DaVinci Resolve MotionEst = Better) to smooth random grain across frames.
- Spatial denoise second with a radius of 1–2 pixels; push threshold only until skin pores remain visible.
Targeted luminance vs chroma
Raise chroma reduction by 20 % more than luminance. You'll kill blotchy colour noise while keeping edge contrast tight—essential for brand logos on sponsor walls.
Match shots fast with a reference still
Create a hero frame graded perfectly, then use Resolve's “shot match to reference” command. It accelerates delivery, a win that complements the pre-production questionnaire you agreed on earlier.
Workflow timeline for stress-free nights
- T-7 days: Confirm schedule, lighting cues and power access with venue.
- T-3 days: Pack double batteries, cards and lights—see our gear redundancy strategies.
- Event day morning: White-balance cards, lens tissue and ND filters in one waist pouch.
- Event +2 hours: Ingest to dual SSDs, checksum with Shotput Pro, label folders by camera angle.
- Next morning: Deliver a 30-second teaser to social channels; clients love fast wins and it supports your local SEO for videographers growth.
Making sustainability part of your offer
LED over tungsten, rechargeable batteries and travel-light kits lower carbon impact and costs. Explore more in our sustainable gear tips. Events value vendors who align with their CSR reports—an easy upsell.
Leverage your low-light mastery for new bookings
Update your showreel and embed it alongside top event videographers listings so planners can benchmark quality instantly. Couple this with behind-the-scenes clips that highlight your lighting and colour workflow.
FAQ
- Should I always shoot in Log for dark venues?
- Only if you can expose at least one stop brighter than base ISO and keep highlights safe. Otherwise choose a low-noise Rec.709-style profile.
- Is a full-frame sensor mandatory?
- No, but it gives 1–1.5 stops advantage. On Super-35, pair fast primes and keep ISO under 3200 for cleaner shadows.
- Can I rely on in-camera noise reduction?
- It softens detail irreversibly. Record clean, then apply denoise in post where you control thresholds.
- What shutter speed works best under LED stage lights?
- Use 1/50 s (25 fps) or 1/60 s (30 fps) to avoid flicker. Higher shutter speeds capture crisper motion but risk banding.
- How do I avoid mixed-colour casts when the DJ floods the floor with magenta?
- Shoot daylight white balance and correct in post, or deploy a small fill light with CTO/CTB gels to restore skin tone.
Quick knowledge check
Wrap-up and next action
Low-light mastery blends preparation, sensor science and thoughtful grading. Implement the checklist above on your next gig, then showcase the results on your portfolio and directory listings. Need a deeper dive? Book a discovery call and let's map a custom lighting plan for your upcoming event.