Phygital shopfronts: integrate AR and lighting for immersive walk-by engagement
Want to turn casual passers-by into eager in-store visitors? By blending augmented reality (AR) layers with strategic lighting, phygital shopfronts transform plain glazing into an interactive billboard that stops people in their tracks and nudges them toward purchase.
Why phygital shopfronts dominate modern high streets
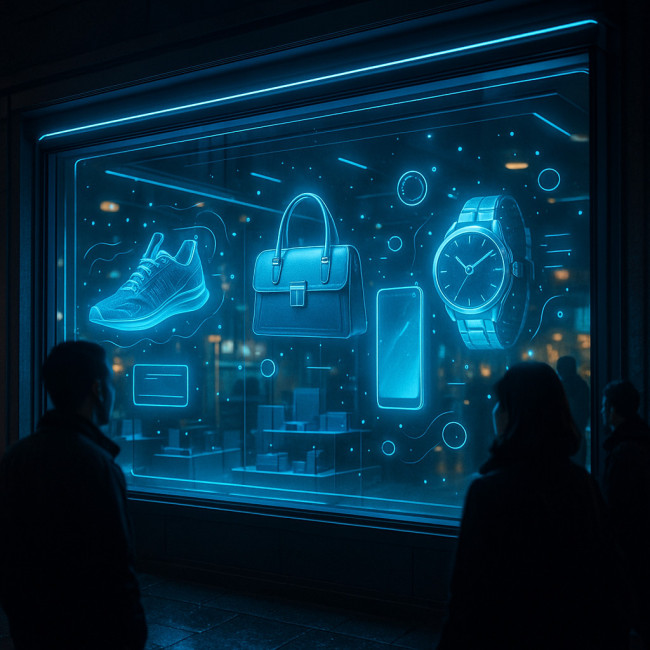
The boundary between e-commerce and brick-and-mortar retail is disappearing. Mobile-first shoppers expect digital storytelling everywhere they look, yet they still crave the sensory hit of a physical store. A phygital shopfront combines both: immersive visuals delivered through AR while curated lighting highlights real-world products. According to global retail studies, stores that deploy interactive windows enjoy up to 25 % higher footfall and a 33 % uplift in dwell time compared with static displays.
Spatial designers listed on award-winning phygital retail portfolios confirm that the wow effect now starts outside, sometimes hours before doors open.
Pillar 1 – Layer AR storytelling onto glass
Pick the right AR technology
- WebAR: reachable via QR code or NFC tag; no app download friction.
- App-based AR: deeper graphics and persistent personalization, but higher adoption barriers.
Trigger strategies
Effective triggers make or break engagement:
- Image markers: use a hero product silhouette on the window as the anchor.
- Spatial mapping: Lidar-enabled phones detect the entire façade and render life-size holograms.
- Geofencing: push a preview to loyal customers as they approach within 20 m.
For deeper technical tips, explore this AR walkthrough guide.
Pillar 2 – Lighting design that guides attention
Static, dynamic or responsive?
| Lighting mode | Investment level | Best use case |
|---|---|---|
| Static LED wash | Low | Budget rollouts, brand colour reinforcement |
| Programmable RGB strips | Medium | Themed seasons, product drops |
| Sensor-driven dynamic scenes | High | Real-time sync with AR interactions |
Key design checkpoints
- Maintain 200–400 lux on hero products to prevent AR glare.
- Offset screens by 15 cm from the glass to reduce reflection ghosts.
- Use narrow 25 ° beams to sculpt silhouettes during evening peaks.
Need a refresher on multi-sensory set-ups? Check the lighting & audio coordination blueprint.
Pillar 3 – Synchronise content and light for walk-by engagement
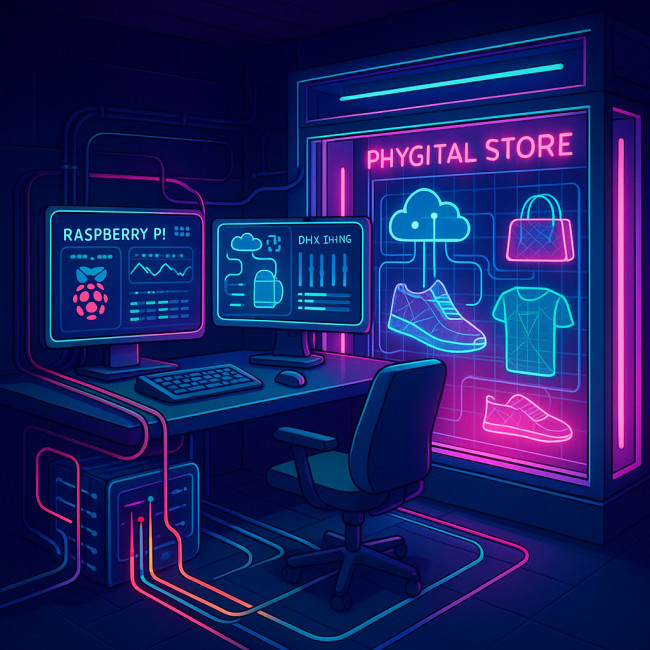
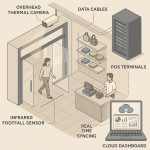
A dazzling AR animation means little if the real window remains dim. Integrate both layers through a central control system—often a lightweight Raspberry-Pi server talking to DMX fixtures and a cloud-based AR CMS. When a passer-by scans the window, the CMS triggers corresponding lighting cues within 120 ms, creating the illusion that the hologram illuminates real products.
Implementation roadmap in six steps
- Audit the façade. Measure glass transmittance, ambient lux at key dayparts and passer-by traffic speeds.
- Prototype the narrative. Storyboard three-scene arcs: hook, explore, call-to-action. Keep each scene under eight seconds to match walk-by pace.
- Select hardware. Combine 4K transparent OLED panels, UVC-rated LED strips and PoE sensors for minimal cabling.
- Develop AR assets. Optimise 3D models under 2 MB each. Stick to gltf format for WebAR and import-ready for Unreal or Unity if using an app.
- Integrate control software. Map AR triggers to DMX DMEs; test latency under varied network loads.
- Soft-launch outside peak hours. Gather heat-map analytics before scaling chain-wide.
Budget guide: basic vs. flagship rollouts
| Cost factor | Basic pop-up (US$) | Flagship store (US$) |
|---|---|---|
| Hardware (displays, LEDs, sensors) | 7 000–12 000 | 45 000–80 000 |
| AR content production | 4 000–8 000 | 25 000–60 000 |
| System integration & testing | 2 000–5 000 | 15 000–30 000 |
| Maintenance per year | 1 200 | 8 000 |
Common mistakes to avoid
- Overlooking daylight glare. A south-facing façade may need anti-reflective film and higher nits.
- Forgetting the CTA. Add a one-tap coupon in the AR layer that drives in-store redemption.
- Ignoring accessibility. Provide captions and voice prompts for visually impaired users.
- Siloed teams. Lighting designers and AR developers must iterate together from day one.
Measuring impact and iterating fast
Analytics makes the investment bankable. Pair window-mounted people counters with AR CMS dashboards:
- Footfall uplift vs. comparable periods.
- Dwell time at the window; aim for 6–10 s to maximise scan chance.
- Scan-to-store conversion traced through QR coupon redemption.
For deeper ROI tactics, read this footfall tracking guide.
Ready for a quick self-check?
FAQ
- Do shoppers need to download an app?
- No. Most retailers now deploy WebAR experiences reachable via QR or NFC, so any modern smartphone browser works.
- How long does a typical phygital shopfront take to install?
- From concept to launch, pop-ups require four to six weeks; flagship rollouts often span three months, including prototyping and compliance checks.
- Will the lighting interfere with product colour accuracy?
- Only if CRI (Colour Rendering Index) is below 90. Choose high-CRI LEDs and calibrate AR colours to the same temperature profile.
- Can we retrofit an existing window display?
- Yes. Transparent film screens and magnetic LED tracks let you upgrade with minimal drilling, ideal for leased premises.
Take action: Secure your competitive edge today—brief your spatial designer about adding AR-ready lighting grids before the next campaign cycle.