Architecture photo post-production: align colours, fix verticals, craft city mood
Great captures can fall flat if colour casts, leaning façades or dull atmospheres sneak in. This guide walks you through a reliable architecture photo post-production workflow—colour alignment, vertical correction and mood grading—so your city shots look publication-ready and consistent across every device.
Why colour alignment and vertical correction shape credibility
Property developers, architects and magazine editors expect straight lines and faithful hues. A single magenta cast or tilted tower erodes trust faster than you can say “aperture.” By mastering architecture photo post-production you will:
- Deliver files that match brand guidelines without endless revision rounds.
- Save up to 40 % of editing time through calibrated presets (see chart below).
- Boost your ranking on architecture photographer directories thanks to cohesive portfolios that algorithms reward.
Pre-flight: Calibrate before you grade
Post-production starts long before Lightroom launches. A weekly monitor calibration with a hardware colorimeter locks in a neutral baseline, ensuring the colour alignment steps that follow remain accurate.
Tip: Keep the ambient light in your editing room below 32 lx and choose a D65 preset on both monitor and calibration device.
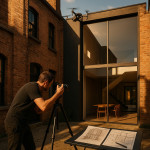
Raw profiles and reference cards
During the shoot, include a grey card or, better, a colour checker in the first frame of each lighting setup. It acts as an anchor for batch white-balance correction later.
Step 1 – Align colours like a pro
1.1 Batch white balance with reference
Select the grey patch in the reference frame, apply resulting settings to the entire series and fine-tune images with mixed light manually.
1.2 Neutralise colour casts
City lights often infuse sodium-orange or LED-green. Use HSL tools:
- In the HSL panel, reduce the saturation of invasive hues slightly.
- Shift the hue slider towards its complementary colour to cancel the cast.
1.3 Harmonise building materials
Concrete, glass and steel should maintain believable tonality. The Calibration panel (Lightroom) or Base Characteristics (Capture One) lets you adjust primary colour channels subtly without wrecking skin tones in lifestyle shots captured on the same shoot day.
Step 2 – Fix verticals and perspective issues
Architectural lines must remain vertical to convey stability. Use the following hierarchy:
- Auto upright: Fast but sometimes guesses wrong on complex skylines.
- Guided upright: Draw two vertical guides along façade edges.
- Lens Profiles: Apply manufacturer profile first to remove barrel or pincushion distortion.
- Manual transform sliders: Fine-tune Shift, Rotate and Aspect for perfect geometry.
Quick reference table
| Correction tool | Best use case | Risk if overused |
|---|---|---|
| Auto upright | Simple façades | Warped rooflines |
| Guided upright | Complex skylines | Minor cropping loss |
| Horizontal/Vertical sliders | Creative tilt-shift | Excessive stretch |
Step 3 – Craft the city mood with targeted grading
3.1 Establish a tonal anchor
Set black and white points first. Architecture images benefit from slightly richer blacks (−5 to −10) to add depth, while highlights should preserve window details.
3.2 Use luminance masking
Modern editors allow luminance range masks. Isolate midtones to add contrast without blowing highlights. This is especially helpful on glass façades reflecting bright skies.
3.3 Colour grading for narrative
Cool mornings, warm dusk or moody overcast—each scenario tells a different architectural story:
- Golden glow: Push midtone colour wheels towards #95854c and add slight magenta in shadows.
- Minimalist cool: Shift highlights toward #bbbbbb and desaturate greens for a concrete-centric palette.
- Rain-soaked grit: Lower overall saturation, raise clarity and add split-toning (teal highlights, muted brown shadows).
Figure 1 – Time saved with calibrated presets
Source : Applied Colormetry Report 2024
Step 4 – Export settings that keep colours aligned everywhere
- Profile: sRGB for web, Adobe RGB or Display P3 if the client requests wide gamut.
- Sharpening: “Screen Low” preset suffices for high-resolution web platforms.
- Embed metadata: Include lens profile tags so clients can audit your correction steps.
Non-destructive workflow checklist
- Duplicate the raw catalogue before you start.
- Apply global presets first, then local adjustments.
- Export as layered TIFF if complex retouching in Photoshop is needed.
- Keep snapshots at each milestone—colour base, vertical fix, final grade.
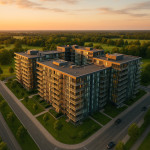
Real-world example: transforming a twilight skyline
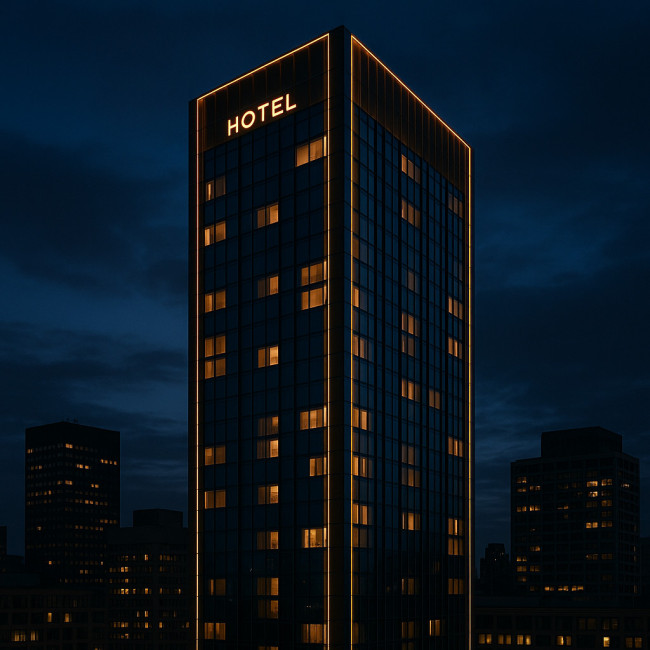
You shot a dusk series for a hotel tower. The raw files lean cyan, and the perspective skew emphasises camera tilt. After calibrating and batch white-balancing, you draw two guides on the tower edges, auto-sync the transform to all frames and finish with a warm shadow tint. The result aligns with brand gold in the hotel's design manual and secures repeat work.
For more on securing flawless captures in the first place, explore our architecture site-scouting guide and consider drone workflows for property marketing to complement your post-production mastery.
Common pitfalls and how to dodge them
- Over-corrected white balance: Keep RGB values of neutral walls within ±3 points to avoid sterile imagery.
- Bowing after perspective fix: Apply moderate Aspect slider tweaks before scaling up transformations.
- Colour banding in gradients: Work in 16-bit depth and apply noise grain softly to mask any banding.
FAQ
- How do I sync colour alignment across an entire project quickly?
- Create a develop preset from your reference-card frame and apply it in the import dialog. Fine-tune only hero shots manually.
- What's the ideal vertical tolerance?
- Keep leaning lines within 0.3° of true vertical—imperceptible to the human eye but measurable by grid overlays.
- Can I rely solely on the transform tool without a tilt-shift lens?
- Yes, modern software corrects moderate skew without degrading quality, especially if you frame with extra headroom for cropping.
- Which colour profile should I deliver to print clients?
- Use Adobe RGB with an embedded profile and supply a soft-proofed PDF so printers can convert accurately to CMYK.
- How do presets affect creative flexibility?
- Presets standardise the base look. Layer local adjustments and HSL tweaks afterwards to preserve creative control.
Test your post-production savvy
Next steps
Solid post-production amplifies flawless captures. Pair the techniques above with smart brief planning from our architecture photographer hiring checklist and learn how blending 3D renders with photos can elevate storytelling even further.
Ready to streamline your editing? Implement the workflow today and watch client feedback transform from “Can you tweak this?” to “Perfect—send the invoice!”