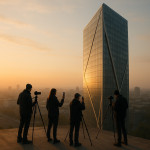
Blending 3D renders with photos to showcase bold architecture projects
Want visuals that impress clients before a single brick is laid? By blending 3D renders with real-world photos, you create striking images that look finished yet feel tangible. This guide walks you through the entire process—from camera prep to seamless post-production—so your next architecture presentation or marketing campaign stands out.
Why mix 3D renders and photography?
Combining computer-generated images with on-site photography unlocks three strategic benefits:
- Speed: Market unbuilt projects months sooner, shaving weeks off conventional photo timelines.
- Cost-control: Swap expensive physical set-ups for virtual elements such as landscaping, furniture or lighting rigs.
- Flexibility: Edit design tweaks without costly reshoots—perfect for iterative client feedback.
Pre-production: plan the shoot with the composite in mind
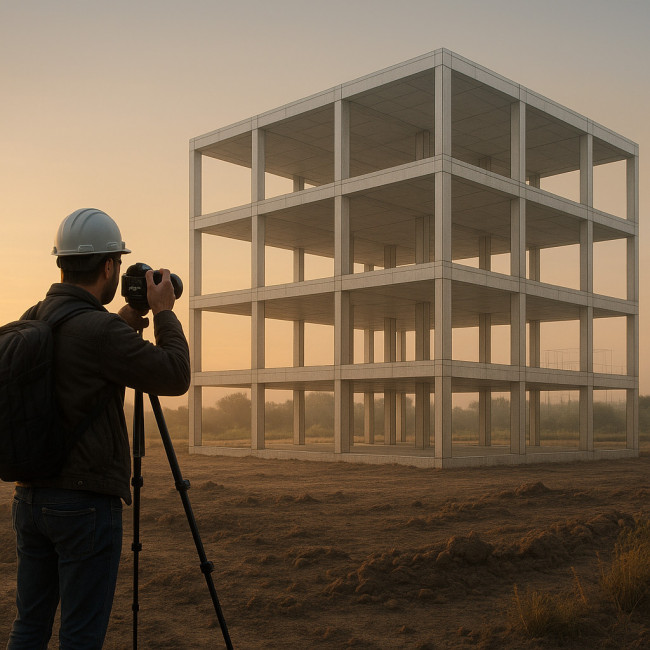
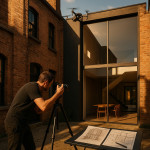
Success starts long before post-production. When you arrive on site, you should already know which lens, camera height and time of day will complement the digital model. Bring printed screenshots of the BIM export to align vantage points, mark tripod feet positions with gaffer tape and record a full 360° HDRI even if you think only the front façade will matter—future variations may call for side light or dusk ambience. Log precise GPS coordinates, compass bearings and local weather notes so the virtual sun in your render engine can mimic reality to the minute. By pre-visualising in such granular detail, you remove the guesswork that often forces artists to warp perspectives, fake reflections or rebuild materials later in the pipeline, saving both hours and credibility.
Match camera angles and focal length
Export the BIM or CAD scene into your 3D software and place a “virtual camera” that mimics your physical gear. Note ISO, focal length and sensor size. On location, lock those settings so the architectural photographer hiring checklist lines up perfectly with the digital lens.
Time your lighting
Real and virtual shadows must fall in the same direction. Use a sun-path app to record solar azimuth and elevation. Feed the data into your render engine so sunrise glow or golden-hour warmth syncs across both mediums.
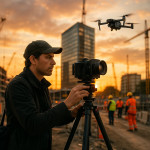
Plan drone perspectives when needed
If the hero shot sits above street level, pre-visualise drone height and tilt in the 3D scene. Your pilot can then replicate the exact coordinates, ensuring the drone workflows provide a plate that matches the digital model pixel-for-pixel.
Shooting the real-world plates
Bracket exposures for dynamic range
Even modern render engines struggle with clipped skies if the base photo is blown out. Shoot three to five exposures at ±2 EV to secure detail in both shadows and highlights.
Capture HDR reference spheres
Photograph a chrome and a matte grey sphere on site. These references help your 3D artist replicate realistic reflections and diffuse light inside the software.
Keep distortion under control
Architectural images rely on clean verticals. Use tilt-shift lenses or correct keystoning in software before the composite stage. For deeper tips, explore our guide on post-production colour alignment.
Post-production workflow: from render to blend
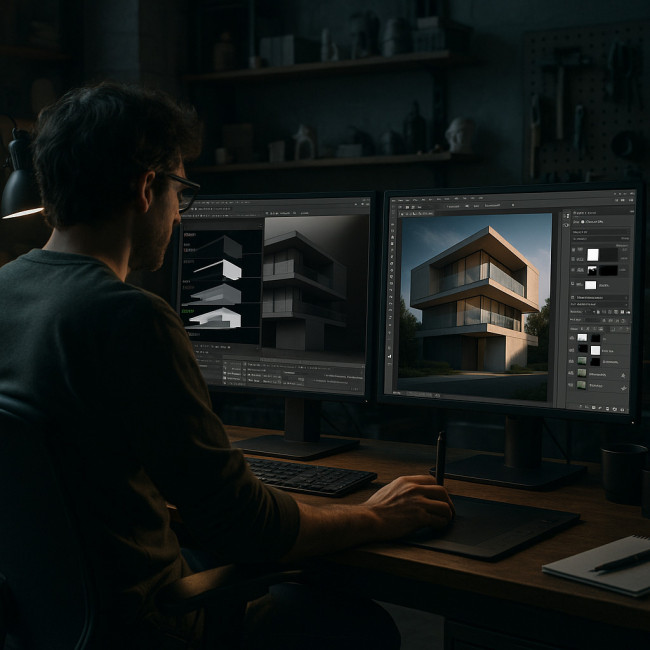
Before any pixel is blended, an organised file pipeline is mandatory. Sort beauty, shadow, reflection and depth passes into clearly named folders, then import them as a layered stack so every opacity tweak or colour adjustment remains non-destructive. Set your working colour space to linear or ACEScg to preserve highlight data when exposure compensation is required. Establish a two-point perspective grid that matches the photo's vanishing lines, lock guides and only then begin masking foliage, mullions or street furniture. By following this disciplined order—file prep, colour management, alignment, then creative polish—you maintain flexibility for client feedback and avoid the nightmare of re-exporting passes when a single mismatch cascades through dozens of layers.
| Render Engine | Output Passes Needed | Ideal Use Case |
|---|---|---|
| V-Ray | Beauty, Reflection, Shadow, Z-Depth | Photoreal marketing visuals |
| Corona | Beauty, LightMix, Cmasking | Quick iteration for client approvals |
| Enscape | Beauty only | Rapid concept mock-ups |
| Unreal Engine | Base Color, Roughness, AO | Interactive walk-throughs |
Export layered passes
Render separate passes (shadow, reflection, Z-depth). This control lets you adjust how new elements sit in the plate, making the blend more convincing.
Align perspectives in compositing software
Load the photo and render into Photoshop or Nuke. Use a two-point perspective grid to snap vanishing lines together. Minor mismatches here break believability instantly.
Blend lighting and shadows
Multiply the shadow pass over the photo, then adjust opacity until it matches ambient levels. For night scenes, add bloom or lens-flare layers so virtual light fixtures bounce realistically off physical surfaces.
Colour-grade globally
Apply a unified LUT or curves adjustment on top of all layers to harmonise temperature and contrast. A subtle filmic grade hides micro-differences between CGI and pixels captured on-site.
Common mistakes (and how to avoid them)
- Misaligned scale: Double-check that virtual human figures match door heights or street furniture.
- Over-clean renders: Add noise and slight chromatic aberration so CGI doesn't look too perfect.
- Ignoring atmospheric haze: Distant objects should receive desaturation and haze just like in the photo.
- Poor file management: Name layers clearly—for a smoother hand-off to the marketing team crafting project-phase snapshots.
Mini case study: Cantilevered concrete villa
A boutique studio needed pre-sale imagery for a hillside villa still awaiting permits. The team photographed the empty plot at 7:15 a.m., then dropped the 3D model into the scene. They:
- Matched the Leica SL2's 24 mm focal length in V-Ray.
- Used sun-path data (42° elevation, 109° azimuth) to sync shadows.
- Added virtual vegetation to hide future retaining walls.
- Graded everything with a warm Kodak 2395 LUT.
Result: high-impact visuals that helped secure 80 % of the development's units off-plan. The images now headline their listing on the architecture photographer directory, driving steady booking inquiries.
Quick knowledge check
FAQ
- Do I need a high-end render engine for convincing blends?
- No. Mid-tier tools like Blender's Cycles work well if you match lighting, camera data and colour grading carefully.
- Which file format preserves layer flexibility?
- Use 16-bit TIFF or layered PSD to retain dynamic range and separate passes.
- How long does a typical composite take?
- Plan two days: one for rendering passes and one for compositing. Complex scenes with heavy foliage may double that time.
- Can I outsource only the 3D part?
- Absolutely. Many studios hire freelance CGI specialists to supply layered EXR files that the in-house team then blends with photos.
- Will blended images pass building-permit boards?
- Most boards accept composites if they're labelled “artist impression.” Always check local regulations first.
Next steps
Ready to elevate your architectural storytelling? Assemble your camera kit, line up 3D passes and start blending. You'll captivate clients long before ribbon-cutting day.
Bonus tip: Share finished composites in your proposal deck; they often get more clicks than technical drawings.