Printmaker lookbook layouts: pairing process photos with final editions
A powerfully designed printmaker lookbook can double as a portfolio and a silent salesperson. By pairing process photos with the final editions, you invite viewers into your studio, prove craftsmanship, and drive sales faster than a single hero shot ever could. This guide walks you through narrative, design, and technical steps to create lookbook layouts that keep collectors scrolling and buying.
Why process-to-product storytelling converts buyers
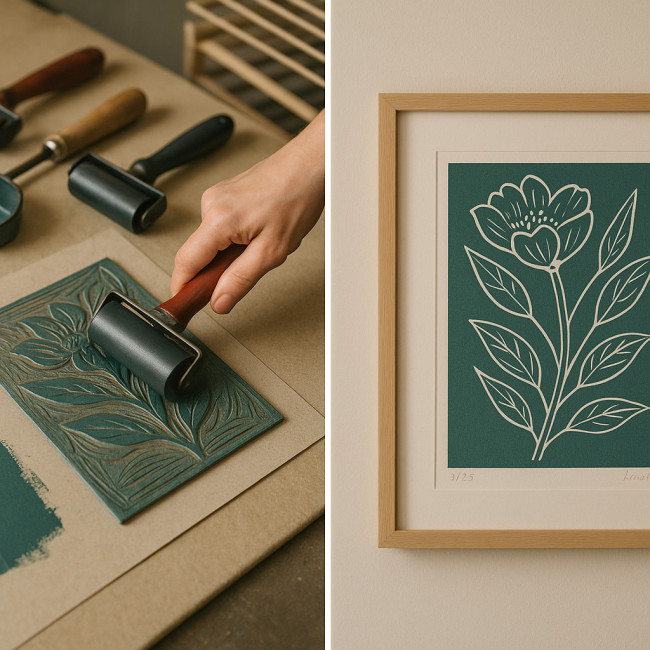
Collectors crave evidence of authenticity. Showing inked plates, registration marks, and drying racks next to numbered editions answers common questions—“Is this hand-pulled?” or “How many impressions exist?”—before prospects even ask. According to a 2023 Shopify study, listings with behind-the-scenes images generated 37 % higher add-to-cart rates than listings that only displayed final products.
- Trust spike: transparency lowers purchase hesitation.
- Education loop: viewers learn about etching, linocut, or screen print processes.
- Shareability: process GIFs and reels fuel social shares, widening reach.
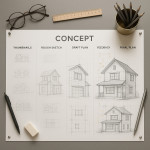
Plan a narrative before designing the layout
Define the hero moment first
Start with the strongest finished print. Everything else supports that hero. Decide which steps—sketch, plate prep, first pull, color layers—best amplify its story.
Batch your photo shoot
Use consistent lighting and lens settings so process images merge seamlessly with the final edition. A mismatched color temperature can make the layout look amateur.
Sequence for suspense
Arrange your storyboard so each page reveals new information, leading viewers toward the reveal. Think: sketch → carving → inking → pull → edition close-up → framed artwork.
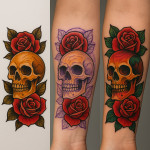
Four proven printmaker lookbook layouts
| Layout name | Best for | Viewer impact | Pro tip |
|---|---|---|---|
| Side-by-Side Split | High-contrast linocuts | Instant comparison | Keep gutters wide to avoid visual crowding. |
| Step Cascade | Multi-layer screenprints | Narrative flow | Number each step in tiny type for clarity. |
| Flip Reveal (interactive PDF) | Monotype editions | Element of surprise | Add subtle page-turn sound for immersion. |
| Animated Overlay | Limited runs aimed at scarcity-driven buyers | Shows build-up of layers | Export as lightweight GIF under 2 MB. |
Design principles that keep focus on the art
- Whitespace is breathing space: 25 % margins frame each step.
- Use a single serif for captions to echo traditional print heritage.
- Contrast captions at 70 % gray; full black competes with ink lines.
- Alt text: embed the keyword “printmaker lookbook layouts” plus technique details.
- File names: “linocut-step-3_process.jpg” beats “IMG_1234.jpg” for SEO.
Photographing process shots that sparkle online
- Clean your press bed. Dust spots become pixel distractions.
- Shoot at f/4 to blur busy studio backgrounds while keeping plate texture sharp.
- Use a polarizing filter to kill glare on wet ink.
- Color-correct with a neutral gray card so tones match the final print.
Need a refresher on photographing tactile surfaces? This guide to shooting 3-D artworks also applies to paper texture and deckled edges.
Editing for tonal consistency
A single tone curve applied across the entire photo set keeps blacks rich and highlights from clipping. Export JPEGs at 85 % quality; it balances crisp line work with fast loading.
Placing CTAs without breaking immersion
After every series, slide in a subtle “Add to Cart” or “Enquire About Availability” button. Match its color to a mid-tone from your print to stay on brand. For limited runs, link to your numbering policy reference (learn how we number editions) to deepen trust.
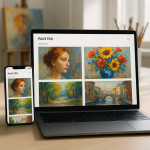
Publishing your printmaker lookbook online
Optimised PDF
Keep file under 10 MB so it sends easily in email pitches.
Scrolling web gallery
Embed lazy-loading images and intersection observers. An accessible template is available on the Artfolio new-portfolio gallery, used by hundreds of image-based creators.
Common mistakes to avoid
- Showing every single pull. Curate ruthlessly; three process shots often suffice.
- Mixing portrait and landscape orientations on the same spread.
- Using stock fonts that clash with your signature chop mark.
- Skipping a colophon page—collectors love paper and ink specs.
- Forgetting alt text; you bury search visibility for “printmaker lookbook layouts.”
Quick quiz: is your layout collector-ready?
FAQ
- How many process photos should a single edition include?
- Three to five well-chosen images cover key stages without overwhelming the viewer.
- Can I use smartphone images for the process shots?
- Yes, if you control lighting and color-correct. A phone with a recent sensor captures enough detail for web and PDF delivery.
- Should I watermark my lookbook images?
- Watermarks can distract. Instead, keep images at 150 dpi and rely on metadata plus your signature chop for protection.
- What's the best file format for interactive lookbooks?
- Export to interactive PDF for email, and HTML5 scroll galleries for web; both handle alt text and linkable CTAs well.
Ready to level up your studio marketing? Pair these layout tactics with community partnerships detailed in our guide to printmaker studio collaborations and watch your orders grow.