Object designer hero shot guide: lighting hacks for three-dimensional pieces
A scroll-stopping hero shot can multiply your object-design enquiries overnight. Follow these field-tested lighting hacks to reveal depth, texture and colour fidelity—without renting a full studio.
Why your hero shot makes or breaks a commission
Buyers rely on a single thumbnail to decide whether to click your portfolio. A well-lit image communicates craftsmanship, scale and material quality faster than any caption. According to a recent Behance trend report, product visuals with pronounced depth generate 38 % more saves than flat-lit images. Good news: you can achieve that depth with three lights, a reflector and a disciplined workflow.
Core lighting principles for 3-D pieces
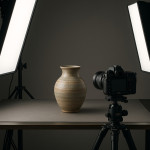
1. Key light at 45 °: shape before sparkle
Place your primary light 45 ° above and 45 ° to the side of the object. This angle casts a controlled shadow that sculpts volume while avoiding harsh hotspots. A large softbox or diffused LED panel works best.
2. Fill light for balanced texture
Set a weaker fill on the opposite side (about one stop lower) to lift mid-tones without killing shadows. If you lack a second light, bounce the key with white foam board. This trick retains the tactile surface that decision-makers zoom in to inspect.
3. Back light to outline the silhouette
A subtle rim or back light separates your design from the backdrop, essential for intricate handles or layered materials. Aim a strip light or bare bulb through diffusion gel to avoid lens flare.
4. Colour temperature harmony
Keep all fixtures within ±150 K to avoid mixed colour casts. For earthy ceramics, 5000 K preserves warm glazes. For brushed metals, 5600 K daylight LEDs enhance cool highlights.
Budget-friendly gear swaps
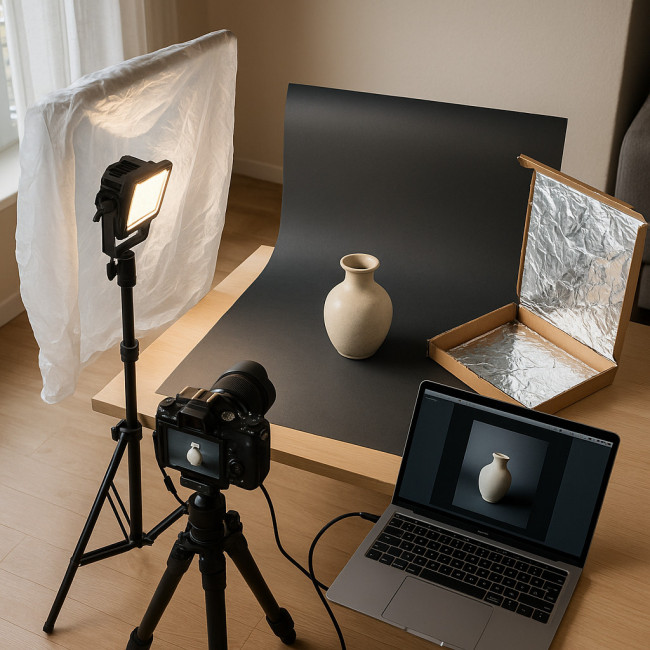
- DIY softbox: Clamp a translucent shower curtain to a cheap LED work light.
- Reflectors: Pizza boxes wrapped in aluminium foil double as silver fill.
- Background: A $10 roll of matte vinyl prevents stray reflections.
Step-by-step hero shot workflow
- Pre-clean: Dust and fingerprint removal saves hours in retouch.
- Build the set: Place the backdrop 60 cm behind the object to soften shadows.
- Position key light: 45 ° angle, one metre away to start.
- Add fill: Adjust until shadow side retains 20–30 % detail on histogram.
- Introduce back light: Feather until a slim highlight traces edges.
- Lock camera settings: f/11, ISO 100, tethered for on-screen checks.
- Capture bracketed set: −1, 0, +1 EV for HDR flexibility.
- Review at 100 %: Inspect texture, noise, and unintended reflections.
Common lighting mistakes—and quick fixes
| Issue | Visual symptom | Solution |
|---|---|---|
| Mixed colour temperature | Blue or orange blotches | Gel mismatched lights or switch bulbs |
| Hotspots on glossy surfaces | Specular burn-outs | Increase diffusion, move light further |
| Flat appearance | No shadow gradient | Lower fill intensity or flag spill |
| Background shadows | Dark halo behind object | Increase object–backdrop distance |
Optimising for online directories
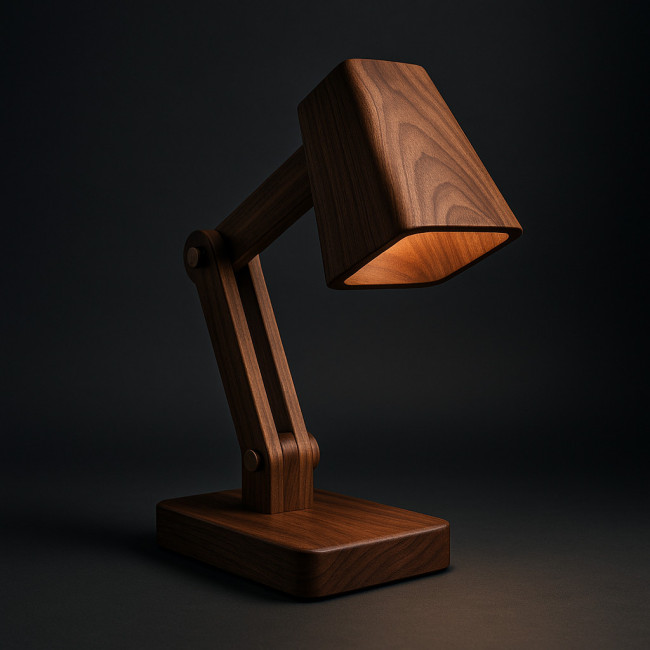
Once your lighting is dialled, export a 2500 px longest edge JPEG at 80 % quality. Compress with mozjpeg to keep file size under 400 KB—vital for Core Web Vitals. Pair the image with alt text such as “walnut lamp hero shot with 45 degree lighting” to boost ranking. For keyword inspiration, scan the advice in SEO quick wins for object designers.
Advanced depth boosters
Focus stacking for intricate details
Shoot a series from front to back and merge in Helicon Focus. Clients exploring photorealistic mock-ups demand tack-sharp renders—focus stacking delivers.
360-degree loops
Capture 24 frames on a turntable. Stitch into a looping GIF or video to complement stills. For gear guidance, check 360-view video equipment tips.
Digital twins
Cut post-production time by generating a scan of your lit object. Syncing the digital twin with your hero shot reassures tech-savvy buyers—detailed in this digital twin visibility guide.
Real-world lighting recipes
Below are three setups tested on recent craft-design submissions to the new craft-designer portfolios feed.
- Matte ceramic vase: Key: 650 W softbox; Fill: white board; Backdrop: pale grey sweep. Aperture f/13 for full depth.
- Polished steel cutlery: Key: 150 cm octabox overhead; Fill: black cards to deepen reflections; Back light: strip with grid.
- Recycled glass pendant: Key: 300 W LED through diffusion; Fill: none; Back light: gelled teal for colour separation.
Quiz: Are your lighting instincts commission-ready?
FAQ
- Do I need three lights to create depth?
- No. A single key plus a reflector and a small LED for rim light can achieve a professional result when positioned carefully.
- What aperture is ideal for small objects?
- Between f/8 and f/13 balances depth of field with diffraction control for most mirrorless sensors.
- How do I prevent fingerprints on glossy items?
- Wear cotton gloves and use an air blower before every shot. Retouching greasy smudges later is far slower.
- Should I shoot RAW or JPEG for hero shots?
- RAW preserves highlight detail critical for reflective materials; export to JPEG only after colour grading.
- How often should I refresh hero images?
- Update every new collection or at least quarterly. Frequent uploads trigger algorithmic boosts, as noted in this visual refresh guide.
Next steps: turn hero shots into paid briefs
Master lighting, upload optimised files, and monitor click-through rates. Pair striking images with concise project notes, and you'll convert browsers into buyers faster. Ready to scale your orders? Explore our roadmap to transition from one-off to small-batch production.
Action time: Block a two-hour slot this week to test the 45-degree setup on your latest piece. Your future clients will thank you.